Saturday, December 3, 2016

Awning


Shortly after we started construction, Julie and I attended a home show in Novi, MI.  One of the decisions we made there was to install a retractable awning from Marygrove Awnings.  A couple days after we placed the order, they called to schedule installation.  "Sorry," I told them, "you have to wait until we have walls to install it on."  Even after the exterior was almost complete, our builder didn't want it installed too early for fear that it would get damaged during installation of something else.  The awning was finally installed in the middle of October, after we were living in the house.

With 2" of rigid foam on the exterior, I was concerned about having sufficiently firm support.  So, before the siding went on, I decided where each bracket would go and had the framers take out a little section of foam and replace it with solid wood.
The framers, who also did the siding and trim, installed some additional trim in the bracket locations.  (Over the sliding door, there would have been trim there anyway.)  The awning installers needed to get extra long lag bolts that would go through the trim, the siding, the furring strips, the rigid foam, the sheathing, and a proper distance into the studs.
Once five brackets were firmly bolted to the house structure, the crew lifted the awning into place and attached it to the brackets.
The awning plugs into a regular outdoor outlet with a conventional 110V plug.  When the rough electrical was done, we planned for the awning by specifying an outlet in a convenient location.
The finished product in the retracted position.
Given the time of year, we haven't had many opportunities yet to sit on the patio under the awning.  However, we have really enjoyed having it on sunny weekend mornings.  Without the awning, it would be hard to find a spot in the family room that is not in the sun's glare.  We can put the awning out as far as needed to create a comfortable spot to sit and have coffee without impeding our view of any airplanes that come and go.

Thursday, December 1, 2016

Landscaping I - Lawn


We didn't get started on landscaping until after construction was complete and we moved in.  We had hopes that our lawn would soon be green like our neighbors' lawns.  Looking at the calendar, it seems more likely that our lawn won't look like the neighbors' until all of them are white.

The soil on our lot is clay.  After the finish grading and stone removal, several truck loads of topsoil were delivered and spread.
We decided to have underground sprinklers installed right away.  Installing the sprinkler system required running a 1" pipe to the outdoors.  It would have been much easier to do that while doing the rough plumbing.  Once the drywall ceiling was installed in the basement, it was much more difficult.  The fact that we extended the patio further than originally planned made it impossible to simply go straight out from the back of the workshop.  Also, since we have two driveways, it was necessary to bore under one of them.  It would have been much easier if we had buried some plastic tubing before doing the concrete driveway.

This shows the landscape contractor pulling the pipes for the irrigation system with a trencher. 
After the irrigation system was installed, the landscape contractor applied hydro-seed.
The hydro-seed was not applied until a couple days before Halloween.  We had an unusually warm November, but that was not enough for the lawn to come in.  As of early December, there is grass if you look close, but that doesn't count as a lawn.  The contractor says that the seed will go dormant during the winter like grass does and will come in strong next spring.

We get a big puddle at the back of the patio every time it rains.  This takes days to dry up.  Hopefully, once we have grass, the grass will absorb it faster.  If not, I need to come up with some other plan.
In the spring, we plan to put in a handful of small bushes and spread wood chips around most of the perimeter of the house.  We are aiming for low maintenance.

Monday, October 24, 2016

Appliances

We purchased our appliances from Home Depot when they were having a sale, which was several months before they were needed in the house.  We selected them online, which worked great.  There are more choices online than in the store, it is easier to sort out which models have which features, and we found the customer reviews to be very helpful.  We went into the store to place the order, which also worked great.  The salesperson at Home Depot was extremely helpful.  We got a significant discount for buying multiple GE appliances at one time.

Arranging for delivery got complicated.  The builder wanted the dishwasher and microwave delivered early enough for the appropriate subcontractors to install them and wanted the range and fridge delivered at the very end so they wouldn't be in the way and at risk of damage.  Home Depot wanted to deliver all of the appliances at once.  After a little negotiation, the builder agreed to have them all delivered at once.  I took some time off work to be at the house when the delivery came.  The fridge, range, and microwave came off the truck as expected, but the dishwasher somehow got dropped from the order.  So, we had two large appliances in the way and lacked one that we needed to install.  After a few calls and another morning off work a week later, all the appliances were present.

We chose an induction range.  The range creates a magnetic field that induces current in the pan to heat up the pan.  That cuts the electricity use substantially compared to a resistance range, but we would need a century for the utility bill savings to justify the extra cost.  The main justification is that it improves cooking.  It responds to setting changes immediately.  It also cooks fast.  Maybe we will make up the cost by eating out less often.  We had to buy new pots and pans, but Julie didn't consider that a drawback.  The oven can be used as a conventional oven or as a convection oven.  I really appreciate that, unlike our previous oven, when my daughter makes cookies the bottoms don't burn before the rest gets baked.

The induction range
We followed the advice of our kitchen designer and chose a counter-depth refrigerator.  You would think less depth would be cheaper, but the opposite is true.  It costs more to get one that is smaller in that dimension.  It still has plenty of capacity for us and it is nice that it doesn't stick out as far.

The refrigerator has a connector on top that would allow us to connect it to the internet if we buy an extra part.  We haven't done that.  We are waiting for some occasion when we really wish we could check the status remotely.  So far, we haven't figured out why we might want to do that.
The best thing about the new dishwasher is that it does a much better job than our old one of getting the dishes clean, so we don't have to get them almost clean when we put them in.  It runs for about four hours, but that hasn't been a problem.

We bought a new washer and dryer when we moved into the apartment during construction.  We had to move and install those ourselves.

Sunday, October 23, 2016

Balcony

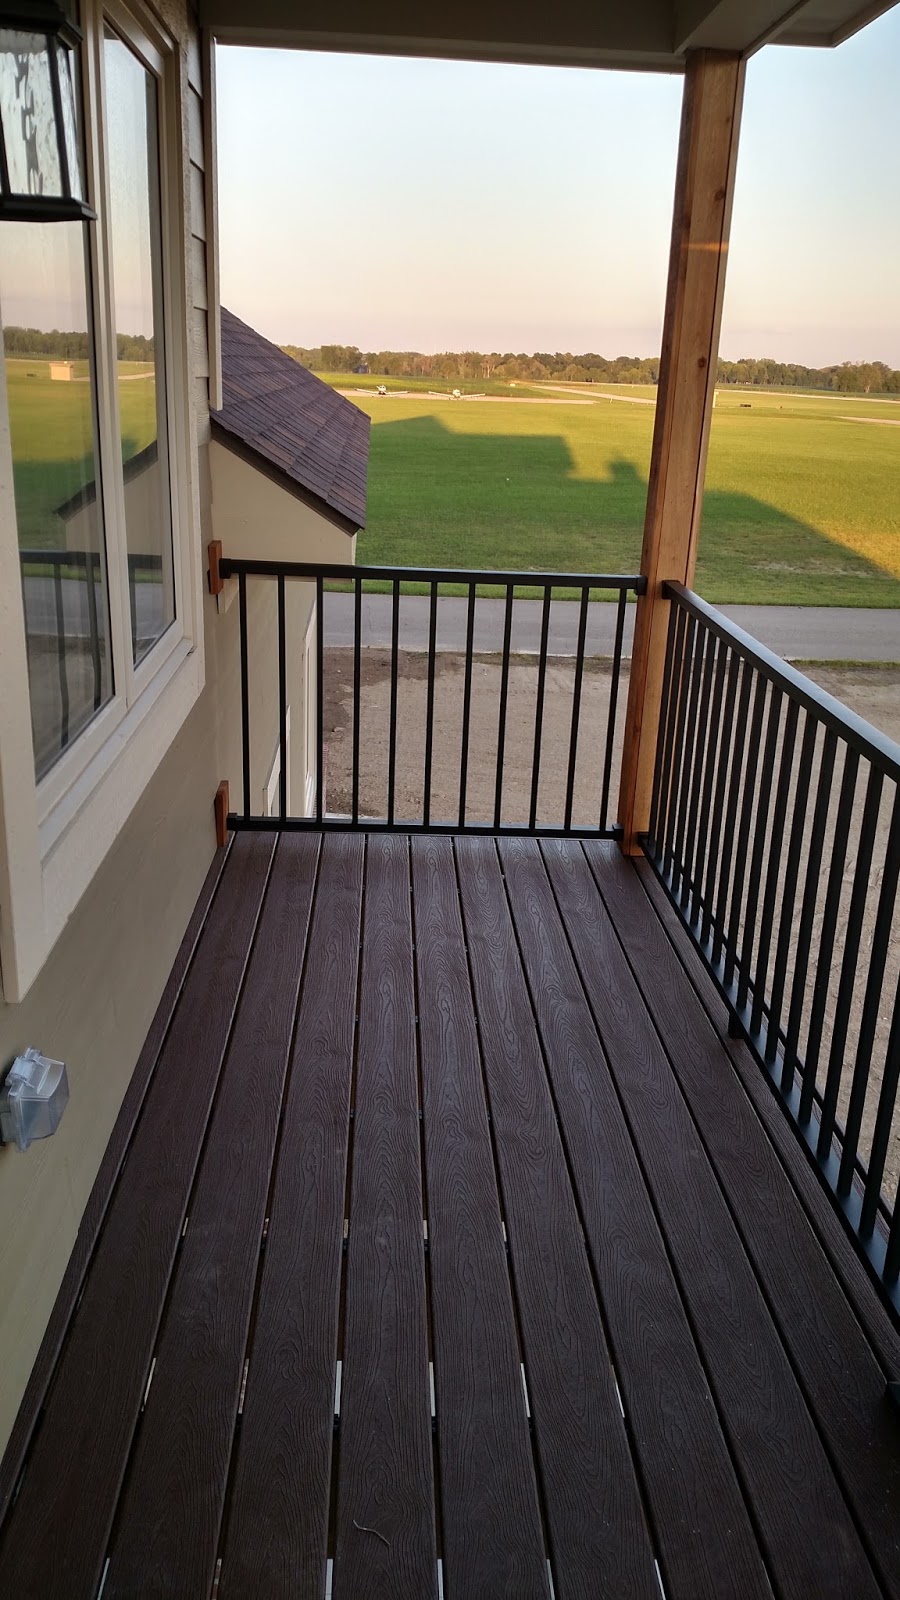
One of our favorite features in the house is the balcony off the master bedroom.  This gives us an elevated spot to watch airplanes.  That is especially nice when they are landing from the West since that end of the runway is difficult to see from ground level.  Additionally, it provides shade for the office window when the sun is high in the summer.  When the sun is low in the winter, the office window is mostly exposed to the sun providing a little solar heating.

I was surprised at the sequence of construction.  The roof over the balcony was built right along with the rest of the roof.  However, all of the structure that supports the roof was not built until much later in the process - around the time that the siding was installed.  In the meantime, the roof was supported with temporary poles.  The Trex boards and railing weren't installed until the house was almost finished.

The roof over the balcony-to-be.
The structure of the balcony was added later.  Concrete was poured to support the posts.
This shows the structure looking out from the master bedroom.
The finished product providing a great view to the far end of the runway.


Wednesday, October 19, 2016

Blower Door Test

One of our goals during construction of the house was to make it air tight.  Of course, no house is ever completely air tight.  Some houses leak a little and other houses leak a lot.  The standard way of measuring air tightness of houses is a blower door test.  A fan is installed into the front door opening to blow air out.  An equal amount of air comes in through whatever leakage paths are in the house.  The technician adjusts the fan speed while measuring the pressure difference between the inside of the house and the outside of the house.  The technician determines the rate of airflow required to establish a 50 Pascal pressure difference.  That air flow rate is compared to the volume of the house to calculate the number of air changes per hour, called ACH50.

A low ACH50 is good.  We had a blower door test performed on our previous house, which was built in the early 1990s.  The ACH50 was about 10.  That house had many of the symptoms of poor air sealing, like rooms that were uncomfortably cold whenever it was windy in the winter.  Modern new constructions houses usually have an ACH50 of 3.0 - 4.0. To be certified under the very rigorous Passive House standard, a house needs an ACH50 of less than 0.6.  Builders of Passive Houses go to great lengths to get to that level.  When I calculated the heating and cooling load for the house, I used 1.5, although I hoped for better.

The floorplan of our house is not ideal for air sealing.  The fact only some of the house has a second story and the ceiling in the hangar is midway up the second story meant that we had more wall/ceiling intersections to seal.  We did a number of things to improve the air tightness.  The worst areas in most houses are the ceilings and the rim joist.  To reduce air leakage through the ceilings, we:
  • located the attic accesses either in the garage or in the gable ends to avoid leakage around attic access doors
  • avoided recessed can lights
  • used spray foam around the intersection of the walls and ceilings
To reduce air leakage around the rim joists, we:
  • applied a peel and stick membrane on the exterior extending from the foundation concrete to the wall sheathing 
  • used spray foam on the interior
To reduce air leakage through the walls, we:
  • taped the joints of the OSB sheathing
  • caulked around the framing on the interior side
  • selected high quality casement windows
So, did these things work?  Yes, they did.  Our blower door test result of 0.82 ACH50 proves it.

Tuesday, October 18, 2016

Flooring

Choosing flooring proved to be a stressful experience.  The flooring supplier had a huge selection, but had a rather small showroom that was only open on weekdays, so we had to take vacation to make our selections.  It was hard to visualize a room from the small samples, especially for types of flooring that have intentional variation.  In the end, we were thrilled with the result, if not the process.

Some people advised us that we should look into something called luxury vinyl plank (LVP) which is vinyl designed to look like hardwood but to cost less and wear much better.  We were nervous about how it would look, so we didn't want to commit to using it throughout all of the areas we had planned to use wood.  We didn't find any samples that excited us, so we passed on that option.

We selected an engineered wood floor (often called wood laminate) for most of the house.  That selection was made several months before the time to order the materials.  When it was time for the flooring company to order the materials, they found that the pattern and texture we selected wasn't actually offered as engineered floor.  We had to decide whether to change to a hand-scraped texture, change to hardwood at substantial extra cost, or start over and select something completely different.  We didn't like the hand-scraped texture.  We spend a little time looking for other options and considered changing to bamboo flooring, but the flooring supplier said he hadn't had good results with that.  We ended up changing to hardwood and changing some areas to carpet in order to reduce the cost impact.

Throughout these changes, it was a challenge to make sure that what got ordered matched our latest decision.  It was also difficult to keep up with the budget implications.  During the process, we believed that we were staying near our allowance.  When the final bills came in, we found that we had substantially overspent.

This is the hardwood that is used through most of the main floor and the upstairs.
We used carpet throughout most of the basement and on the stairways.  The utility room and workshop have bare concrete floor.
I was surprised one day to find that the master bedroom was carpeted, since we had selected hardwood for that room.  Fortunately, the flooring installer agreed that it was a mistake and returned to install the correct flooring.
In the laundry room and two of the bathrooms, we used luxury vinyl tile (LVT) which is designed to look like tile at a fraction of the cost.  As mentioned in a previous post, the master bathroom is tiled.

Sunday, October 16, 2016

Fireplace

I am behind on posting about progress on the house.  My policy has been to wait until some particular aspect is finished to post about it.  As the house neared completion in late September, there were many aspects that were almost, but not quite, finished.  Then, the house was completed, we moved in, and life has been too hectic to do blog posts.

We probably changed our minds more about the fireplace than any other single element.  From the beginning, we planned for a direct vent natural gas fireplace, which draws all combustion air from outdoors.  Initially, we selected a pretty traditional unit that attempts to look like a wood fire.  Then, we changed our minds and decided on a wider, more contemporary unit.  Of course, like most other design changes, that added some cost.

During framing, an area is framed for the fireplace.
The fireplace unit is installed and vent pipe is installed to the chimney.  The vent pipe is actually a pipe within a pipe.  The exhaust goes up through the inner pipe.  Combustion air comes in through the outer pipe.
This shows the unit from behind.  In addition to the air intake and exhaust, the installers hooked up a natural gas line and electrical controls.  The electrical controls were later moved because they were in the way of the HVAC ductwork.


After drywall and installation of  a mantle, it is starting to look much more like a fireplace.  A TV will be mounted to the wall above the mantle.  We would have preferred to have the mantle lower so the TV wouldn't be so high, but the fireplace documentation sets a minimum separation.
We changed our minds repeatedly regarding how to finish the wall around the fireplace.  We talked about stacked stone, but didn't want to go that far over the budget.  Eventually, we decided on a 6" border using the same tile that we used for the backsplash in the kitchen.  
Here is the end product in operation.